This is a draft prototype that is a work in progress and should be considered a prototype. It has not been medically tested and should not be represented as such. Any use of the files/instructions is at your own risk.
Any home-made mask should never be used as a first line of defense but rather by people working with the elderly or immunosuppressed to free up the better masks for the people working the front line.
Parts:
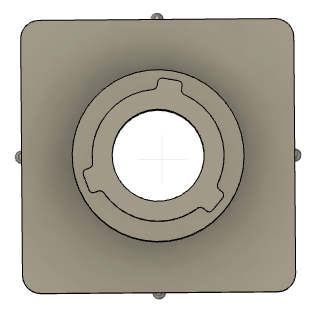
- 3D Printed Parts – Main Face / Filter Adapter. Print at 30-40% infill, no supports are needed on most printers. Download / Reference link on thingaverse (files here are old)
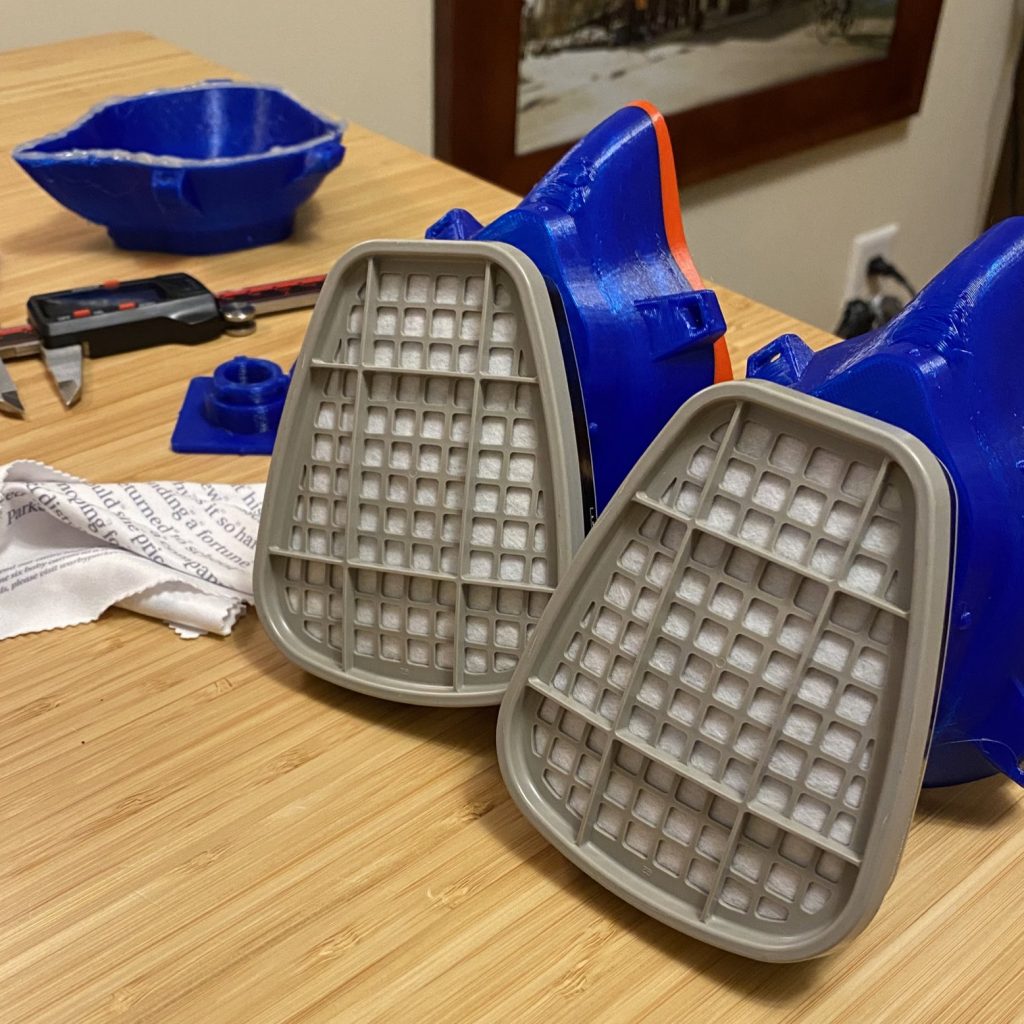
- Filter – 3M 6001 – check paint supply stores, see image.
- Foam Seal Strip – Home Depot Link though similar will work.
-
Elastic fabric bands ties – any.
- Print parts. I’ve printed at 30-40% infill. You can go higher on the main face plates but don’t go too high on the filter adapter because the seal-fit is pretty tight.
- Snap the filter plate into the main face plate. The plate should be oriented down like this. The nose of the facemask should face up.
- Test the fit of the filter before going to the next step. The filter should rotate into place. The fit will be tight so be careful not to crack the adapter plate.
- Once you’ve tested the filter fit you can use a hot glue gun to seal the parts together. This is optional but recommended if you have a hot glue gun.

- We can now add the rubber foam to the inside edge to help seal the mask to the face.

- Lastly, tie two elastic bands to the sides to allow the mask to be adjusted to fit.

3M 6001 Filter looks like this. It may be found in paint supply stores. Online inventory seems limited but the filters seem available from local paint stores.
3D Printed Parts
We can design additional adapter plates for other commercial filters or MERV-13 housings for other filter material if you have them. If you’re not sure about the filter, start printing facemask parts as these take 3-5 hours to print.
Current status and next steps:
Prototype 1 – Complete – but filters not available to fit.
Prototype 2 – Print failed
Prototype 3 – Adapter plate construction, done. Rotation of filter plate was off and was adjusted 15 degrees to make the filter face down.
Prototype 4 – Adapter plate working and adjusted. Rubber foam installed initially. Working on finding a way to test the equality/breathability of the mask in an objective way.
Prototype 5 – Adapter plate can break off because fit is very tight. Adding 1mm of additional space to receiving arm.
To Do:
- Test quality of mask in terms of air-fit
- Test if CO2 buildup is problematic / airflow for longer durations.
- Test / Inquire if mask sterilization is needed and recommended instructions for this.
- Do the elastic bands need to be washable/disposable?
- Additional adapter plates for other commercially available filters?
- Re-design mask to have less print body/surface near adapter plate to reduce print time.
- Prototype with a two-material print. PLA for bulk then TPU for a softer and tighter fit to face.